Business cards are a physical printed card containing all the essential contact information. When designing a business card it needs to fit certain specifications for it to be printed correctly. In most cases when a client requests a business card design, you need to create a standard size business card.
I have attached the final template file at the end of this article.
In this guide, we will be creating a 3.5 x 2-inch business card with bleed, trim and safe area.
Affinity Designer makes it very easy for you to create print designs with bleed. So, this guide will be very easy to follow along.
Why do we need a bleed and safe area anyway?
When we give artworks for print, the printer prints it on a large sheet of paper which is then trimmed down to the size we want. If there is a misalignment while cutting, it will result in your artwork having a white margin on a side or two. Having a bleed allows you to avoid the white margin, and run artwork to the edge of a page. A good size for a bleed is 1⁄8 of an inch, which is about 3mm.
Setting up a document
You only need to configure a few settings at Document Setup to get you started.
First, here is what we want the new document to look like.
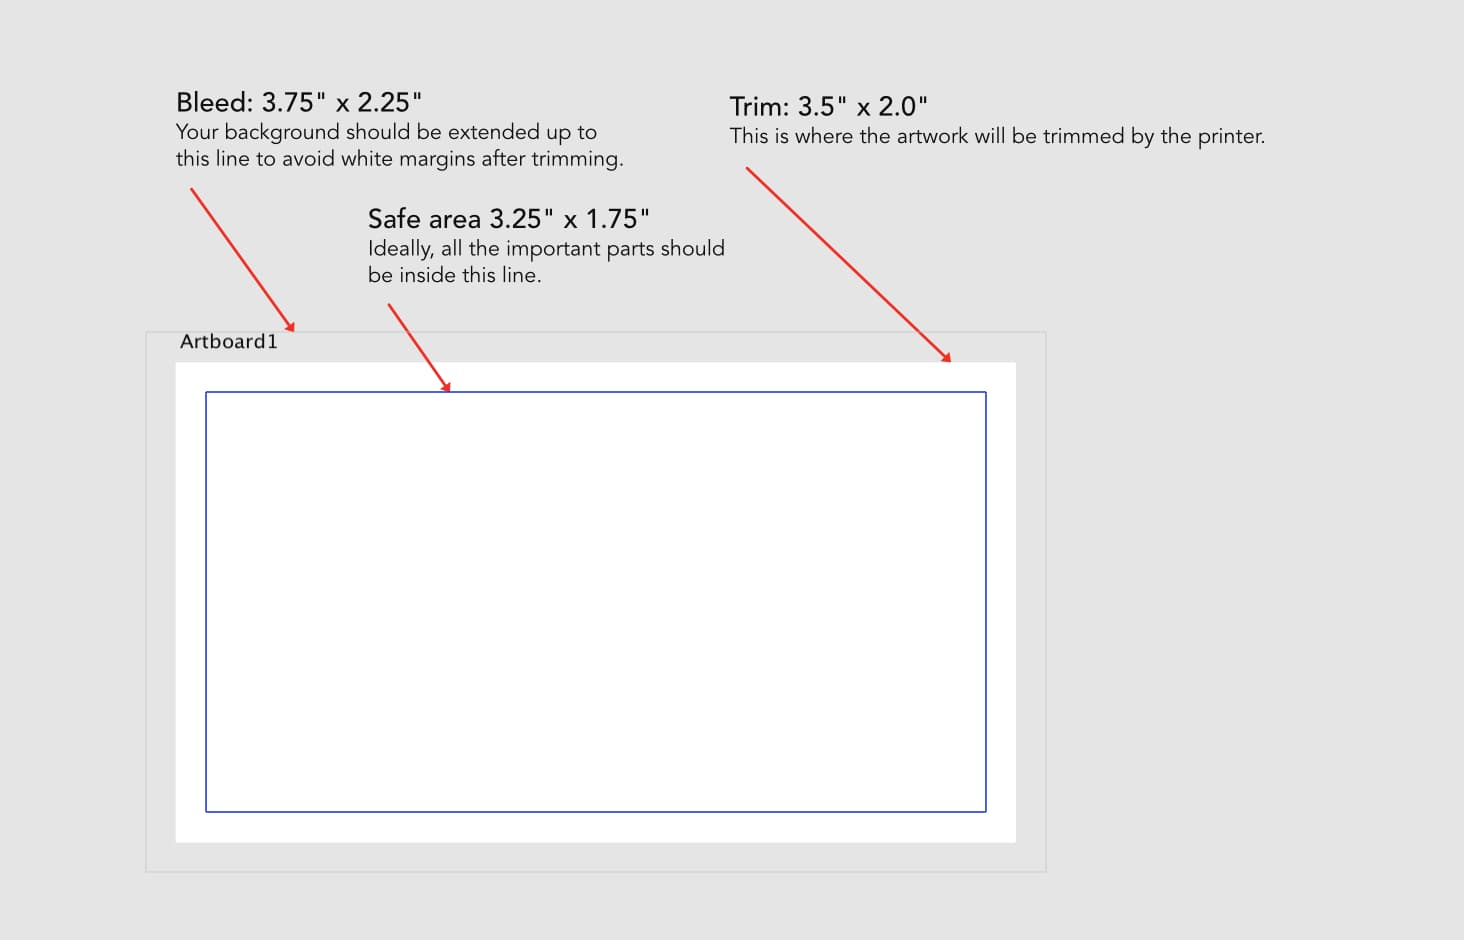
Business card template with explanation.
Let’s get to it:
Open Affinity Designer and go to File > New, New Document dialog will open. From there select the following options. I will explain each option.
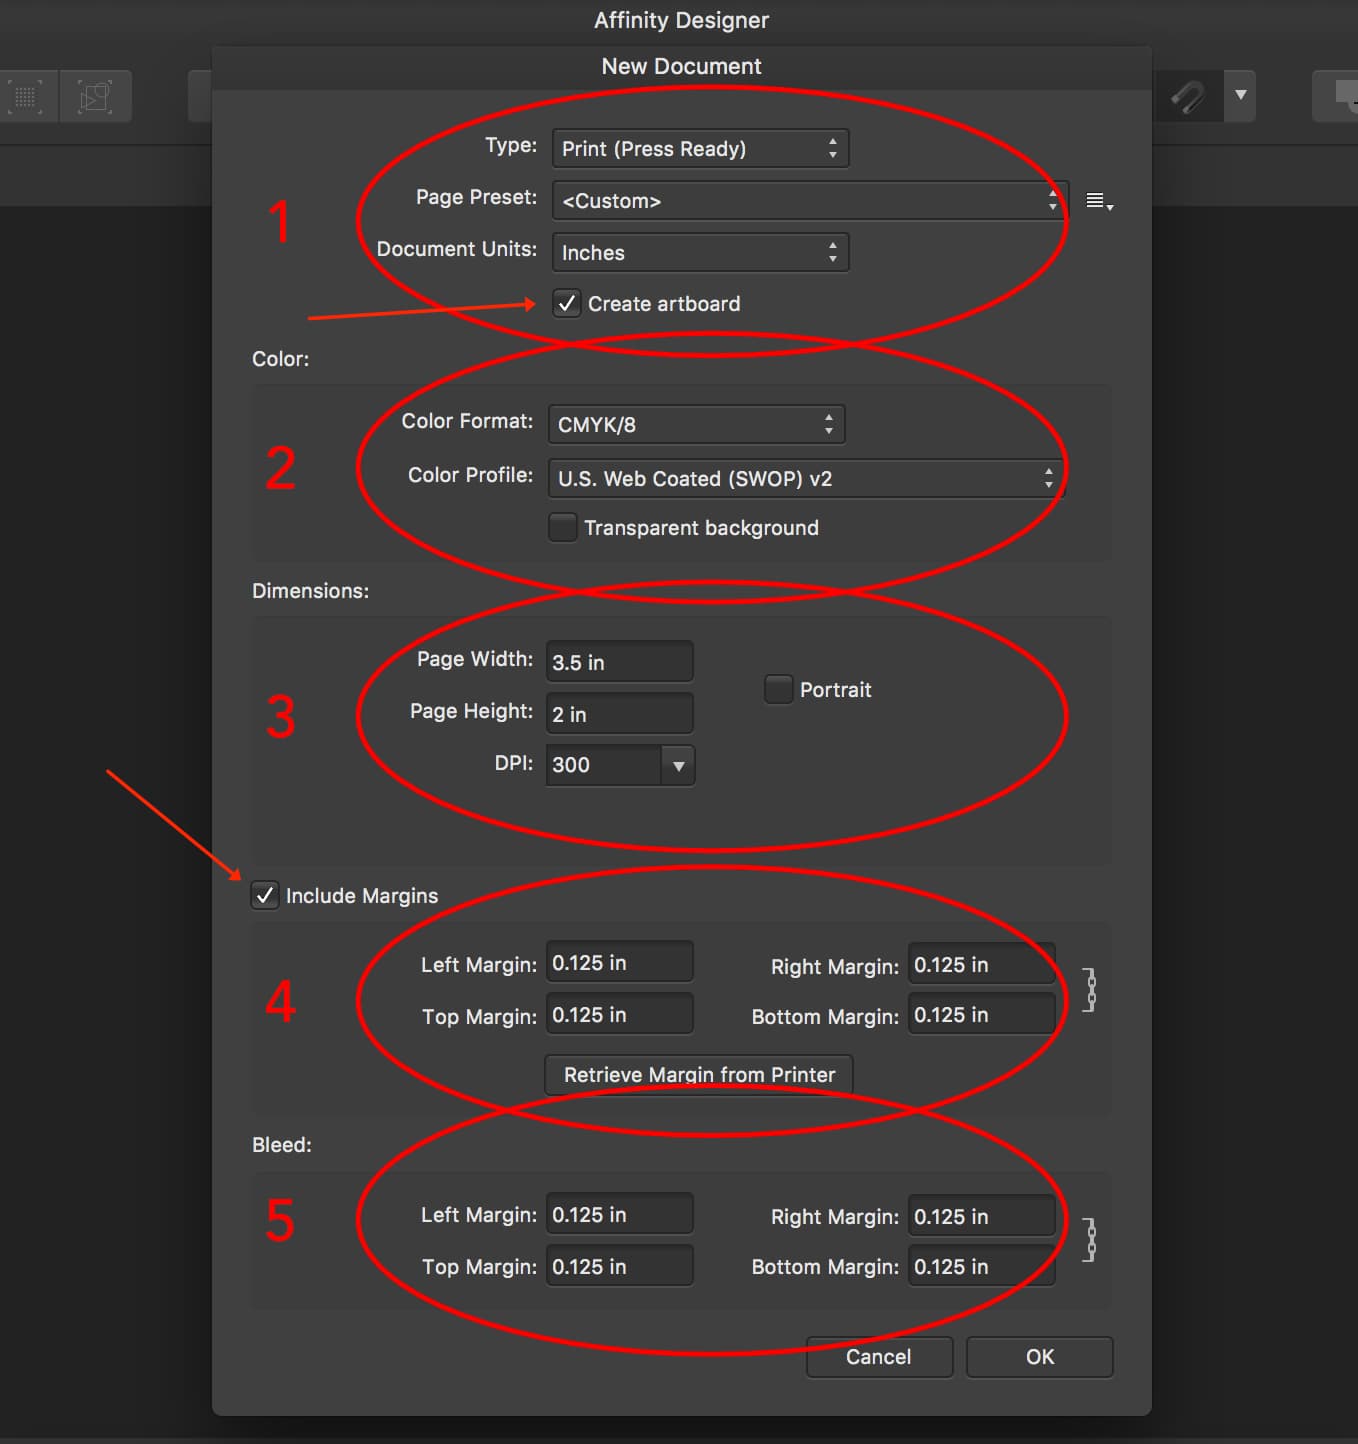
New Document dialog.
- Choose
Print (Press Ready)as a document type. This preset will set up all the appropriate settings for print including color format, color profile and DPI. I have chosen to show Document Units in Inches so that it will be easy to set the 3.5x2 inches business card size, and also Create artboard option. You don’t need to select this option, I have done it to create two sides of the business card inside one file. - When document type was chosen, it automatically set up the Color Format and Color Profile. CMYK is used in professional printing, and color profiles define color spaces, which is referenced against standardises ICC color. I have kept the default Color profile, but you can choose whichever works for you (talk to your printer).
- Dimensions. Here we set up the Business card size (this is the trim size). 3.5in x 2in. DPI is set to 300, for print work you should always provide your artwork with 300DPI or greater.
- Check
Include Marginsand link margins by clicking the Link Margins icon to the right. Set margin size to 0.125 inches. - Link margins on the Bleed section and set it to 0.125 and click Ok.
This will create our document with a proper bleed and safe area.
Like me, if you want to create two sides for the business card, click Artboard Tool and set size to Document Size and click Insert Artboard to get two artboards with identical settings. If sizes and margins are different on your new artboard, you can click the Document Setup button and set the sizes. You can label them ‘Front’ and ‘Back’ and save your template. You can then use this template every time you need to create a Business card for your clients.
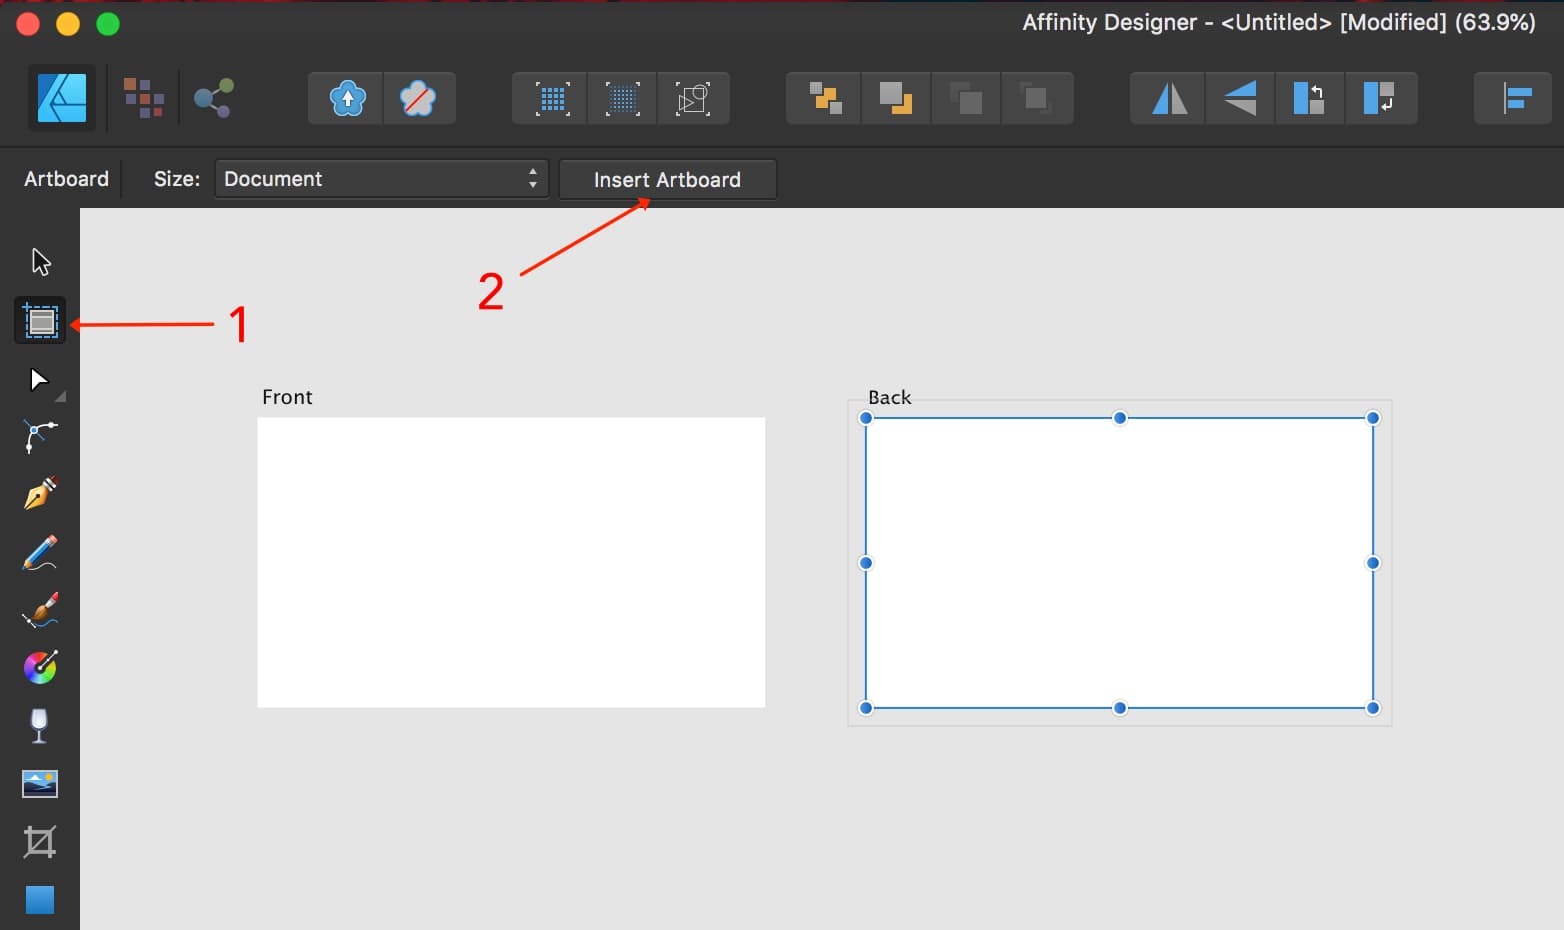
Create new artboard.
Exporting
When you are done designing your Business card artwork, and ready to give to the printer, make sure all the fonts are outlined Right click > Convert to curves or by choosing Text as Curves for Embed fonts on Export options. You can find export options under More on export dialog or as a Studio Panel in Export Persona.
If you have created a two-sided Business card, save both sides separately (you can do this by settingArea to the artboard on the export dialog).
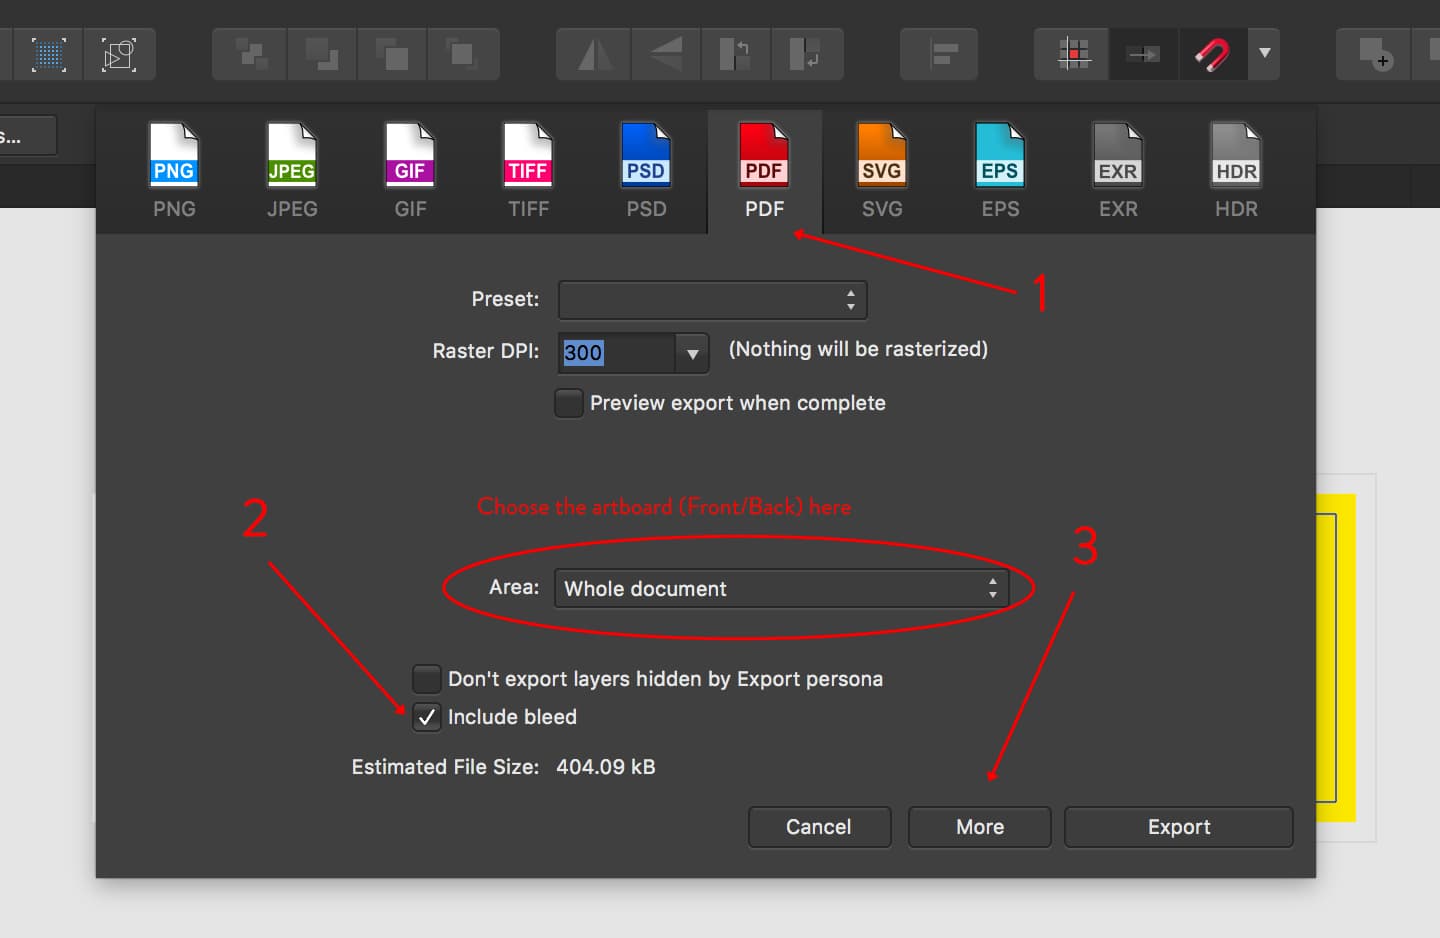
Export dialog.
Choose PDF on the export dialog and check include bleed. Click on More button to open Export options dialog. This is where you set print options.
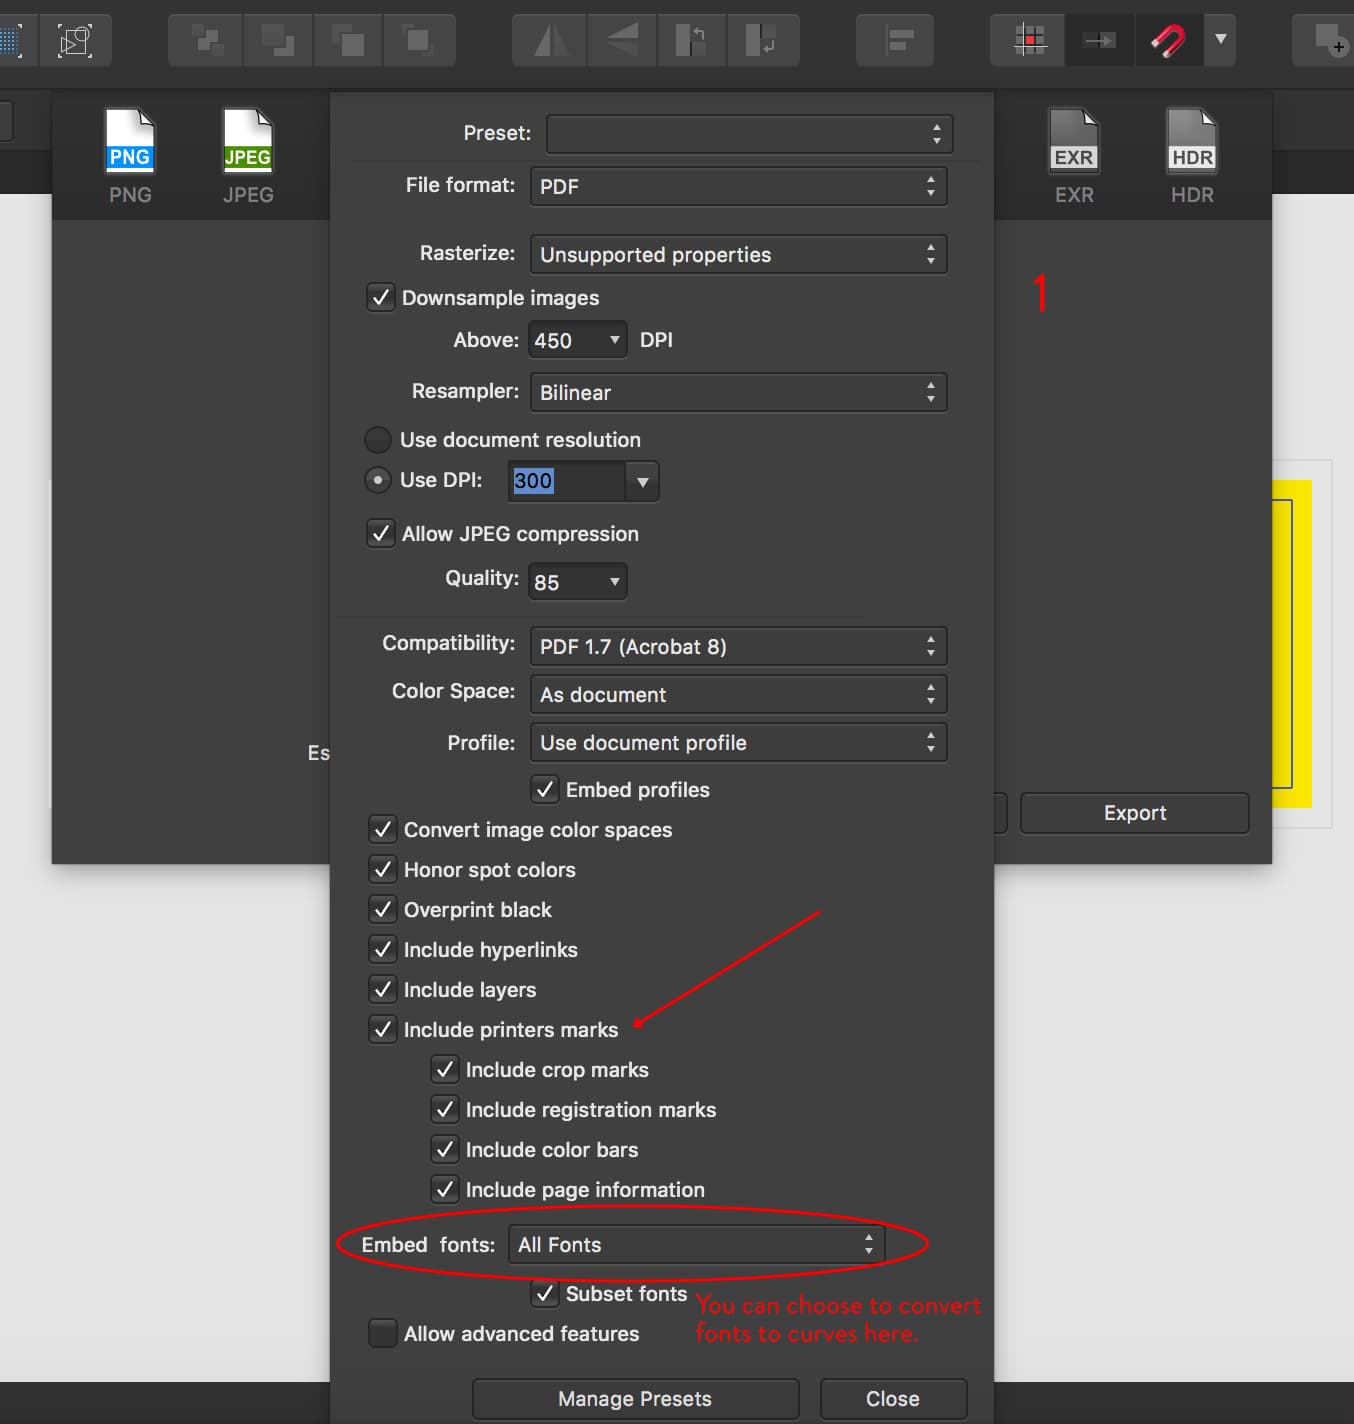
Export options.
Make sure to check Include printers marks and choose all or some of it depending on what you want.
If you export through the Export Persona, the process is similar. Export options are on a Studio Panel.
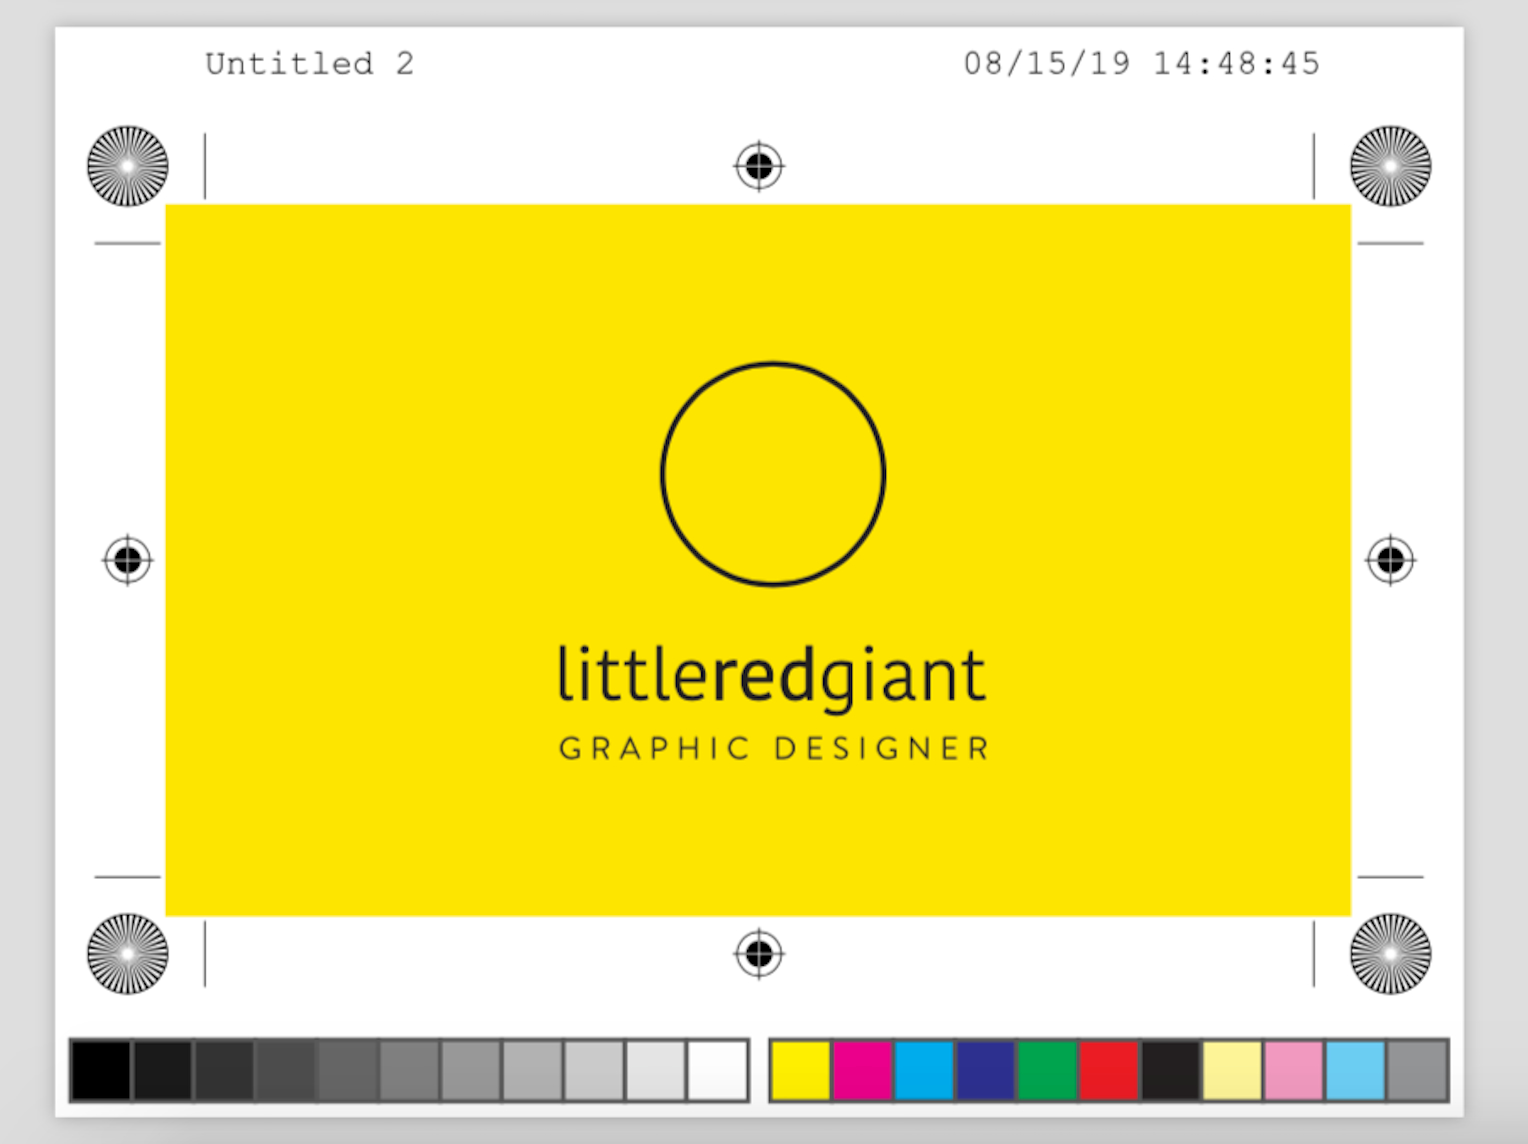
Exported Business card.
The exported file has all the information that the printer need to print your artwork.
That is all, good luck.
Click here to Download Affinity Designer template